Are you looking for a fun and creative way to spend your time? If so, why not try your hand at drawing Piggy?
This may sound like a strange activity, but it can be surprisingly therapeutic. And, who knows, you may have a cute new friend!
How to Draw Piggy the Perfect Way Every Time You Draw Him!
Table of contents [Show]
Introduction
To get started, you will need some basic supplies. A sheet of paper, a pencil, and an eraser are all you need to get started drawing a pig. You may want to have a few different colors of pencils or markers on hand to add some variety to your pig's coloring.
Once your supplies are gathered, find a comfortable spot to sit or recline in. Draw a light sketch of a pig in the middle of your paper using a pencil so you can erase it later if needed. Then start fleshing out your Piggy's features.
Start with the big shapes like the eyes, nose, and mouth. Remember to make the eyes more significant than you think they should be! Once the bare face is sketched, add details like nostrils, eyelashes, and wrinkles.
When happy with your pig's looks, go over your pencil lines with a pen or marker. Add any final details and color in your pig as desired. Hang your picture up and enjoy your handiwork!
What You'll Need
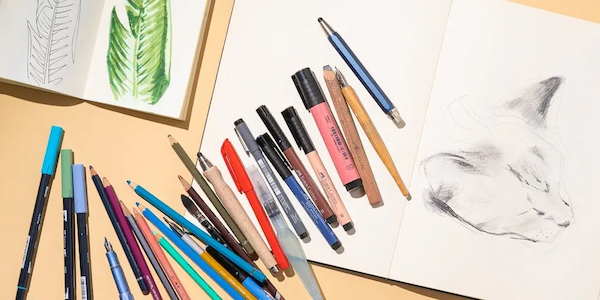
To draw a piggy, you will need the following:
- a piece of paper
- a pencil
- an eraser
- a pen or marker
Optional:
- crayons, colored pencils, or paints
- ruler
Sketching the Head
When sketching Piggy, start with a small oval for the base of the head. Then, add two smaller ovals for the eyes. Add a curved line for the nose and two small circles inside the lead for the pupils. Finally, draw a curved line for the mouth.
Drawing the Ears
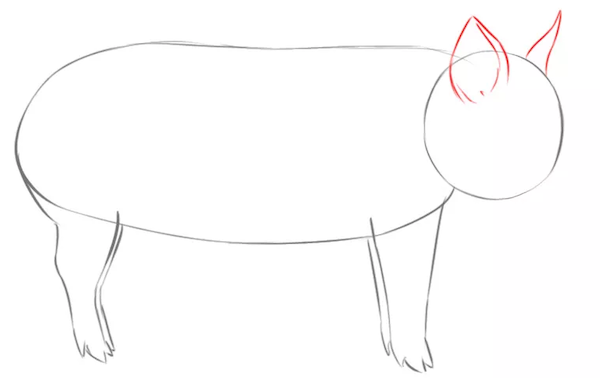
To draw the ears, draw two small oval shapes on either side of the head. Then, draw a line across the top of each oval to divide it into two sections. Next, draw two curved lines coming down from the top of each ear, and connect them using a curved line. Finally, add some details to the inside of each ear using small circles.
Shaping the Face
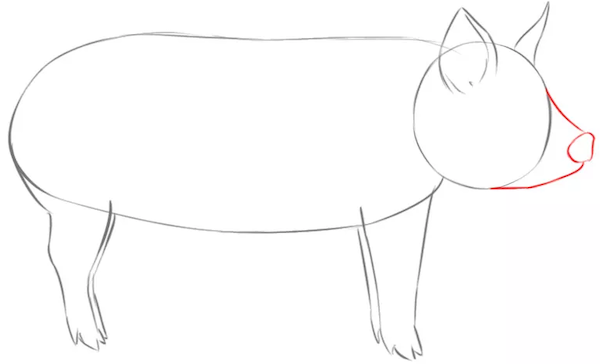
To make a face look more 3-dimensional, you will need to add some shading. Start by drawing a curved line above each eye, curving more steeply at the outer edge of the eye. Then, draw another curved line below each eye. Finally, connect the two lines with a short horizontal line to form the pig's snout.
Finishing the Head
To finish the head, draw a curved line extending from the snout. Then, add details to the pig's face. Draw small circles for the eyes and a curved line for the smiling mouth. Finally, enclose a small oval within each ear.
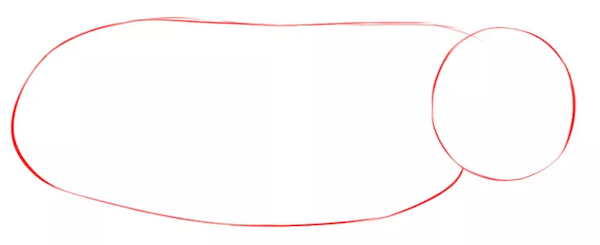
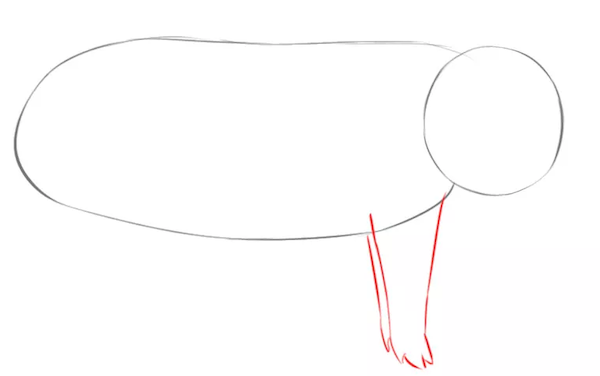
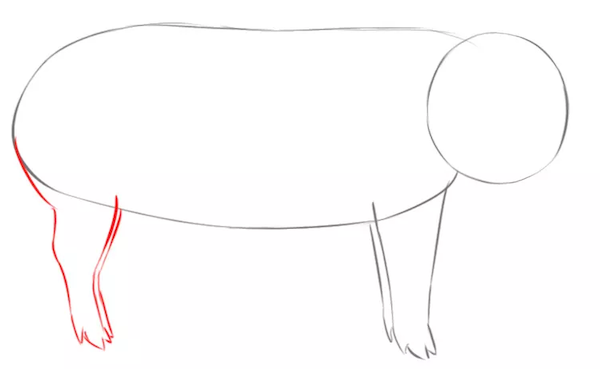
Sketching the Body
To start, sketch a rectangle for the body. This doesn't have to be perfect. Next, trace two small circles for the eyes. Underneath the eyes, draw a smaller oval for the nose. Next, add an arc for the mouth. Finally, add two small triangles for the ears.
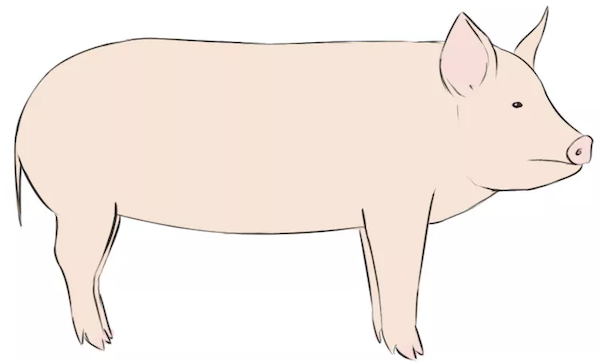
Finishing the Pig
Now that the basic shape of the pig is complete, you can start to add in the details to finish your drawing.
You will need to add some shading to make the pig look more complete. Pigs are pink, so use a light pink pencil or crayon to add shadows on the side of the body that is furthest from the light. For example, if you are using sunlight as your light source, the cloud will be on the side of the pig, facing away from the sun.
Add details such as eyes, nostrils, and a mouth to make your pig look even more realistic. You can also give Piggy some personality by giving it cute accessories like a bow or glasses. Draw these items on a separate piece of paper, cut them out, and glue them onto your pig.
Conclusion
There’s a common misconception that drawing is something only talented people can do. This isn’t true. Even people who think they have no artistic talent can learn how to draw, and here’s how. It all starts with patience.
No matter what you want to remove, you need to understand that it will take time for you to master your craft.
If you want to be able to sketch quickly or create complex pieces of art, practice makes perfect.
The more time you spend drawing, whether in front of a blank sheet of paper or on an app like Paper by FiftyThree or Sketchbook Pro, the better your work will become over time.
FAQ's
How to draw piggy torcher
It is a real pain when you draw Piggy, and he doesn’t turn out how you want him to. It can be hard to replicate all of his little details. We have found one method to make it so much easier for anyone to draw a piggy torch that they won’t even believe it.
Here are some step-by-step instructions on how to draw him perfectly every time:
Step 1: Begin with a circle representing your piggy’s head. The process should be about half an inch in diameter and lightly drawn in pencil. When satisfied with your ring, go over it with a pen or marker. This will ensure that there aren’t any gaps between your pen strokes later on, which would ruin your drawing completely!
Step 2: Draw two lines from either side of your circle for his ears. These lines should be about three inches long and come out at a slight angle from his head (see image below).
Step 3: Draw his eyes! This is one of the most important steps! You want to make sure these are perfect because they’ll give him life when you’re finished. They should be about half an inch apart and three-quarters of an inch in diameter (see the image below).
Step 4: His nose should be small so it doesn’t overpower his face. It should be about a quarter-inch long and located right between his eyes (see image below).
Step 5: The final step in making your piggy torcher is to add a mouth to finish your drawing!
How to draw distorted piggy
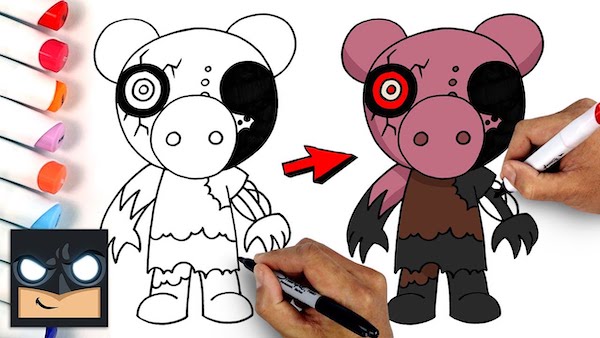
The first step in learning how to draw distorted piggies is learning how to draw an average pig in good proportion.
To do that, follow these steps.
First, start with two circles for their eyes and an oval for their body.
Next, you’ll need to add some nostrils and ears.
Finally, you can add some limbs (two arms and two legs). Now that you know how to draw a regular pig in proper proportions let’s move on to drawing distorted pigs!
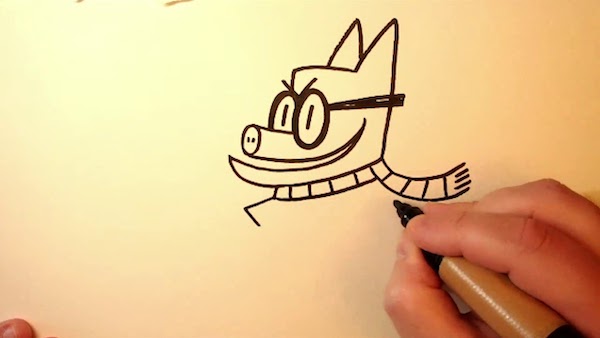
How to draw piggy from a dogman
Start by drawing a large circle for his body. Then draw two eyes and a triangle nose on his face. Next, draw two ears on top of his head and four legs on each side of him to resemble those of a dogman. Then you can finish your drawing by adding whiskers, a mouth, and fur around him. After that, you are done! That was how to draw Piggy from Dogman, step by step. Practice makes perfect, so keep practicing over and over until it is second nature!